
🧂 INGREDIENTS (Detailed Notes)
Main Protein
-
1 whole chicken, chopped into serving pieces, skin-on
Skin-on helps release natural oils, enhances flavor, and creates a richer sauce. Bone-in pieces also help the sauce thicken naturally.
Aromatics & Seasonings
-
1 head garlic, crushed or minced
Garlic is the star of this dish — more garlic = deeper, sweeter aroma. -
¼ cup soy sauce
Use regular Filipino or light soy for salt + umami. -
1 tbsp dark soy sauce (optional)
Adds deeper brown color and a touch of sweetness. -
1 tbsp oyster sauce (optional)
Boosts umami and slightly thickens the sauce. -
1 tbsp sugar (brown or white)
Balances saltiness; brown sugar adds a caramel-like undertone. -
1 cup water
Enough liquid to braise without boiling. -
2 tbsp cooking oil
-
½ tsp ground pepper
-
1 pc bay leaf (optional)
Adds subtle herbal aroma. -
1 tbsp vinegar (optional)
Lifts the flavor and cuts through richness—especially good if chicken is fatty.
🔥 OPTION 1: POT METHOD (Traditional Stove-Top Braise)
⏳ Total Time: ~35 minutes
The pot method gives better browning and deeper flavor due to searing.
1. Sear the Chicken — 6–8 minutes
Heat oil in a heavy pot or deep pan.
Add chicken pieces skin-side down.
-
Let the skin render fat without moving too much.
-
Brown lightly—not aiming for crispy, just golden edges.
-
Browning improves flavor through the Maillard reaction.
Tip:
If the chicken releases water, increase heat to medium-high to get better color.
2. Add Garlic — 1 minute
Add all crushed or minced garlic.
-
Stir until fragrant.
-
Allow garlic to lightly toast in the rendered chicken fat.
-
Avoid burning — burnt garlic becomes bitter.
3. Add Sauces & Simmer — 20–25 minutes
Pour in:
-
soy sauce
-
dark soy sauce (optional)
-
oyster sauce (optional)
-
sugar
-
water
-
bay leaf
Mix gently.
Lower heat to medium, cover, and let it simmer.
-
Chicken becomes tender.
-
Flavors meld as the sauce reduces.
-
Some fat rises to the top — this is normal and helps richness.
Tip:
If too salty, add ¼ cup water.
If too watery, uncover and simmer longer.
4. Optional Vinegar Step — 2 minutes
Add 1 tbsp vinegar and simmer without stirring.
Why no stirring?
In Filipino-style braises, vinegar needs to evaporate slightly first to prevent raw sourness.
After 2 minutes, you may stir.
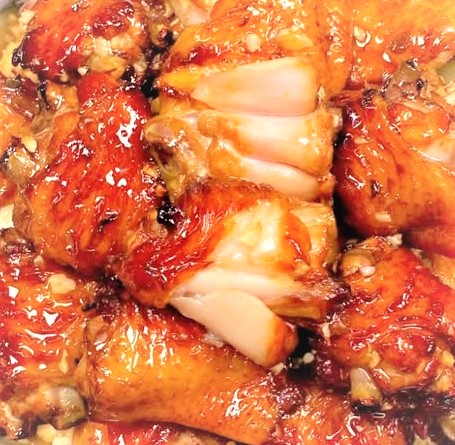
5. Serve
The sauce should be:
-
glossy
-
medium-thick
-
salty-sweet
-
full of garlic aroma
Best served with white rice or garlic rice.
🍲 OPTION 2: RICE COOKER METHOD (Effortless & Hands-Off)
⏳ Total Time: ~40–45 minutes
This method is great when you want to “dump & cook” with minimal supervision.
1. Combine All Ingredients
Place everything into the rice cooker:
-
chicken
-
soy sauce
-
garlic
-
sugar
-
pepper
-
optional ingredients
Mix well so chicken is evenly coated.
Tip:
Line bones and bigger pieces at the bottom for more even cooking.
2. Cook
Press Cook and leave it.
-
The rice cooker will simmer the chicken in its own juices.
-
It usually switches to Warm after about 30–40 minutes.
-
Stir once halfway through if possible to prevent sticking.
3. Thicken the Sauce (Optional) — 5–10 minutes
If sauce is watery:
-
Press Cook again.
-
Keep lid open.
-
Let moisture evaporate until sauce thickens.
4. Serve Hot
For extra flavor, top with:
-
fried garlic
-
sliced spring onions
-
a drizzle of sesame oil
🍽 SERVING & PAIRING SUGGESTIONS
-
Garlic fried rice
-
Steamed vegetables
-
Atchara (pickled papaya) for acidity
-
Chili-garlic oil on the side
-
Hard-boiled eggs braised in the sauce (excellent add-on!)
🔄 VARIATIONS
Spicy Version
-
Add 2–3 chopped chilies or 1 tsp chili flakes.
Sweet-Style
-
Add 1–2 more tablespoons of brown sugar.
Ginger-Garlic Style
-
Add 1–2 inches of sliced ginger along with garlic.
Caramelized Version
-
Caramelize 1 tbsp sugar in oil first before adding chicken.