
Ube Ice Candy is one of the most beloved Filipino frozen treats. Sold in sari-sari stores, school canteens, and even by street vendors, this creamy, chewy, and refreshing dessert brings back childhood memories of hot afternoons and simple joys. The combination of real ube, creamy milk, cassava thickener, and vibrant ube flavoring creates a nostalgic and satisfying frozen snack that both kids and adults adore.
Below is a complete, long-form recipe with highly detailed steps, tips, variations, and troubleshooting so your ice candy comes out perfectly smooth, creamy, and flavorful every time.
📌 Ingredients (with explanations & notes)
Main Ingredients
-
½ cup ube (purple yam), steamed and mashed
-
Ube gives the ice candy its natural color, aroma, and earthy sweetness.
-
For convenience, you may use purple sweet potato as a substitute. Although the flavor is slightly different, the color and texture work well.
-
-
8 cups water, divided
-
This is used in different stages of the recipe: cooking ube, mixing cassava, and creating the base mixture.
-
-
½ cup cassava flour
-
This acts as the thickening agent and gives the ice candy its signature chewy, slightly elastic texture.
-
Do NOT replace with cornstarch; the texture will not be the same.
-
-
⅓ cup sugar
-
Adjust according to sweetness preference.
-
The sugar dissolves in hot water to create the sweet base.
-
-
¾ cup condensed milk
-
Adds creaminess and richness.
-
The amount can be increased for a sweeter, creamier profile.
-
-
1 cup evaporated milk or coconut milk (gata)
-
Evaporated milk produces a classic ice candy taste.
-
Coconut milk creates a Filipino “ginataan-style” flavor.
-
-
1 tablespoon ube flavoring
-
Enhances color and aroma.
-
Brands vary in intensity; adjust accordingly.
-
-
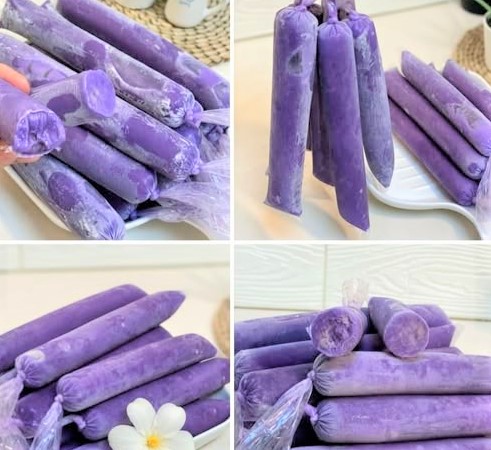
Ice candy plastic bags or popsicle molds
-
Traditional ice candy is long, narrow, and tied at the top.
-

👩🍳 Step-by-Step Instructions (very detailed)
1. Prepare and cook the ube
-
Fill a pot with enough water to submerge the purple yam completely.
-
Bring the water to a boil over medium-high heat.
-
Add the whole or sliced purple yam and cook for 25–30 minutes, or until fork-tender.
-
Drain the water and allow the ube to cool slightly.
-
Remove the skin (if not pre-peeled) and mash until smooth.
-
Tip: The smoother the ube, the creamier your ice candy will be.
-
2. Make the ube mixture
-
In a large bowl, combine the mashed ube with 1 cup of water.
-
Mix thoroughly until the mixture is smooth and lump-free.
-
A whisk or hand blender can help break down fibers for an ultra-smooth finish.
-
-
Set aside.
3. Prepare the cassava flour mixture
-
In a separate bowl, mix 2 cups water with ½ cup cassava flour.
-
Stir continuously until the cassava flour dissolves completely.
-
This prevents lumps when added to the hot mixture later.
-
-
Set aside.
4. Make the sweetened base
-
In a large pot, pour in 5 cups water and bring it to a full rolling boil.
-
Add the ⅓ cup sugar and stir until fully dissolved.
-
Keep the pot over medium heat.
-
Consistent heat is important for activating the cassava thickener.
-
5. Add the cassava mixture
-
Slowly pour the cassava mixture into the boiling sugar-water.
-
Stir continuously while pouring to avoid clumps.
-
Continue stirring for several minutes until the liquid begins to thicken slightly.
-
It should resemble a light, runny pudding.
-
6. Add the ube mixture
-
Add the ube mixture into the pot.
-
Pour in the ube flavoring.
-
Stir well until the mixture turns a rich, even purple color.
-
Allow the mixture to simmer gently for 2–3 minutes so the flavors blend.
7. Add the milk
-
Add the ¾ cup condensed milk and mix thoroughly.
-
Pour in the 1 cup evaporated milk (or coconut milk).
-
Continue stirring until everything is evenly combined.
-
Taste and adjust:
-
Add more sugar or condensed milk if you prefer it sweeter.
-
Add more milk if you want a creamier consistency.
-
8. Cool the mixture
-
Turn off the heat and allow the mixture to cool for around 30 minutes.
-
Cooling prevents the plastic ice candy bags from melting or deforming.
9. Fill the ice candy bags
-
Using a funnel, carefully pour the mixture into each ice candy plastic.
-
Leave about 1½ inches at the top to allow room for tying.
-
Twist the top tightly and tie into a knot.
-
Repeat until all mixture is used.
10. Freeze
-
Arrange the ice candy in the freezer, laying them flat for even freezing.
-
Freeze for at least 6 hours, or overnight for best consistency.
🍦✨ Serving Suggestions
-
Serve directly from the freezer for a refreshing snack.
-
Crush them slightly for a “frozen slush” texture.
-
Pair with halo-halo, mais con yelo, or sago’t gulaman!
Variations You Can Try
1. Ube-Keso Ice Candy
Add grated cheese before tying the bags.
2. Ube-Macapuno Ice Candy
Add macapuno strips for a coconut-y twist.
3. Ube with Tapioca Pearls
Cook small tapioca pearls and add them at the bottom of each bag.
4. Ultra-Creamy Version
Increase condensed milk to 1 cup and use full coconut milk instead of evaporated milk.
🛠️ Troubleshooting Guide
Mixture too thick?
Add ½ to 1 cup warm water and stir well.
Mixture too thin?
Simmer longer or add 1–2 tablespoons cassava flour dissolved in water.
Lumps forming?
Strain the mixture before filling the bags.
Ice candy icy instead of creamy?
Add more milk or increase cassava slightly.
💜 Final Notes
This Ube Ice Candy recipe is highly customizable, easy to prepare, and perfect for both home consumption and small business use. The combination of real ube, creamy milk, and cassava gives it the traditional Filipino ice candy texture many people grew up enjoying.
Follow the steps carefully, and you’ll have smooth, creamy, and vibrant purple ice candies that everyone will love!